Black and White Brick Wall Photoshop Easy
Step 1
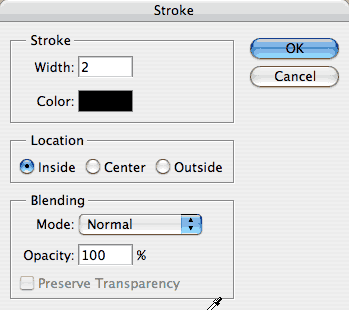
Create a new Document
50 x 50 Pixels
RBG mode
White background
Select the entire image area: Select>all
Choose Edit>Stroke
Enter a setting of 2 – inside

Step 2
Choose the Line tool (Under the custom shape in the toolbar)
4 Pixels
 Black
Black
Choose the fill pixels option from the options bar
Turn anti-aliasing OFF
Draw a horizontal line through the middle
Add another vertical line through the middle on the top half only (as shown)
 With the marquee tool select the outside border at the top left and delete it (press the delete key)
Repeat for the right top as shown
Step 3
 We have now created a pattern for our bricks
Select>All
Edit Define Pattern and then name the pattern bricks
You can now close the bricks document, we dont need it anymore
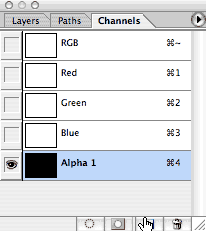 Create a new Document – This is where we will use our pattern to create a wall
400 x 300 Pixels (You can use any size)
RBG mode
White background
Choose the channels palette and create a new alpha channel
Step 4
Choose edit>Fill
Select pattern and find our bricks pattern
Step 5
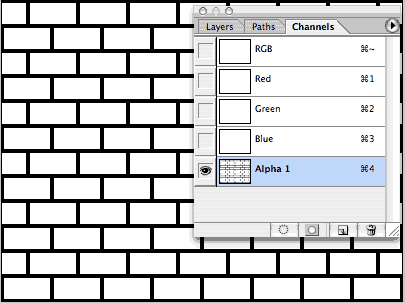
Here is the basic brick pattern applied to the channel.
Can you believe this is where some tutorials end? Not this one, lets make some texture and depth
Step 6

We are going to round the corners of the bricks
Choose Filter>Blur>Gausian Blur
Step 7

Now choose Image>Adjustments>Levels
Move the sliders closer to gether to create the hard edges, rounded corners
The shape is now complete – Depth time
Step 8
Choose Filter>Gaussian blur
Blur it so that the edges are still visable but the bricks are kind of gray. This is going to nake the bricks look rounded in 3D space
Click OK and then DONT TOUCH ANYTHING!
Step 9

Choose Edit>Fade (If you touched anything since the last step this is not avaliable)
Choose 80% and Linear Burn
Notice the blur will blend into the shape of the bricks
Step 10
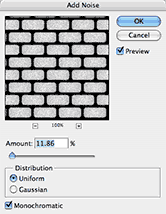
Fianl part of the texture preperation
Choose Filter>Noise>Add Noise
Use 12% or less, we just want a hint
Step 11

Choose the layers palette and click on the background to return to the normal display thumbnail
Select 50% gray for the foreground and white for the background colors
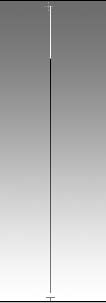
Choose the linear gradient tool
Drag the gradient tool from the bottom to the top of the image to create a gradient
Step 12

Choose Filter>Render>Lighting effects (Enter the settings shown)
Choose the Alpha 1 from texture channel to load our bricks texture
Select a spotlight and choose a brick red color from the top color picker
Click ok
Step 13
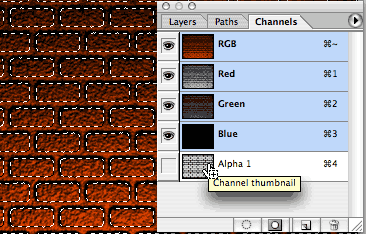
We now have a pretty good brick texture, but lets take it futher…
Open the channels palette
Hold down the ctrl/Cmd key and click on the alpha 1 thumbnail – You should see a selection around the shapes of the bricks
Step 14
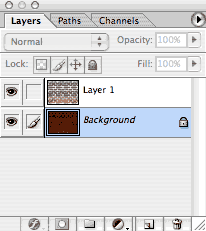
Return to the layers palette
Make sure the Background is active by clicking on the thumbnail
With the selection (Bricks outline) still active Press Ctrl/Cmd + J -This will copy the bricks to a new layer
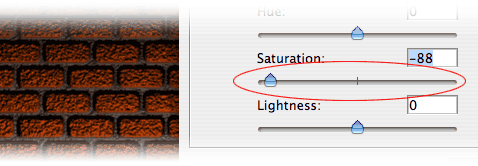
Choose the background and select Image>Adjustments>Hue/Saturation
Move the saturation slider to the left to reduce the color of the mortar to a nice gray
Step 15
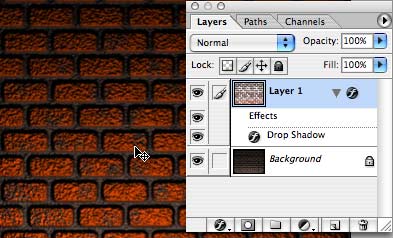
As a final touch add a drop shadow to the top layer
Choose the eraser tool and make the brush one of the "splatter" presets
Dab the edges of the bricks to erode them a little bit.
There you have your realistic bricks!!!!
For more cool textures and techniques like this on an easy to follow video format check out photoshopCD.com
Get in-the-know!
CS6 Superguide
Join our list to receive more tutorials and tips on Photoshop. Get exclusive tutorials, discounts and the free super guides. No spam, all content, no more than once a week.
If you're on our list, you will receive it free by email as soon as it's available. If not, sign up now and get the CS6 Superguide for free. Or click the image below.
Source: https://photoshopcafe.com/tutorials/brick/brick.htm
0 Response to "Black and White Brick Wall Photoshop Easy"
Post a Comment